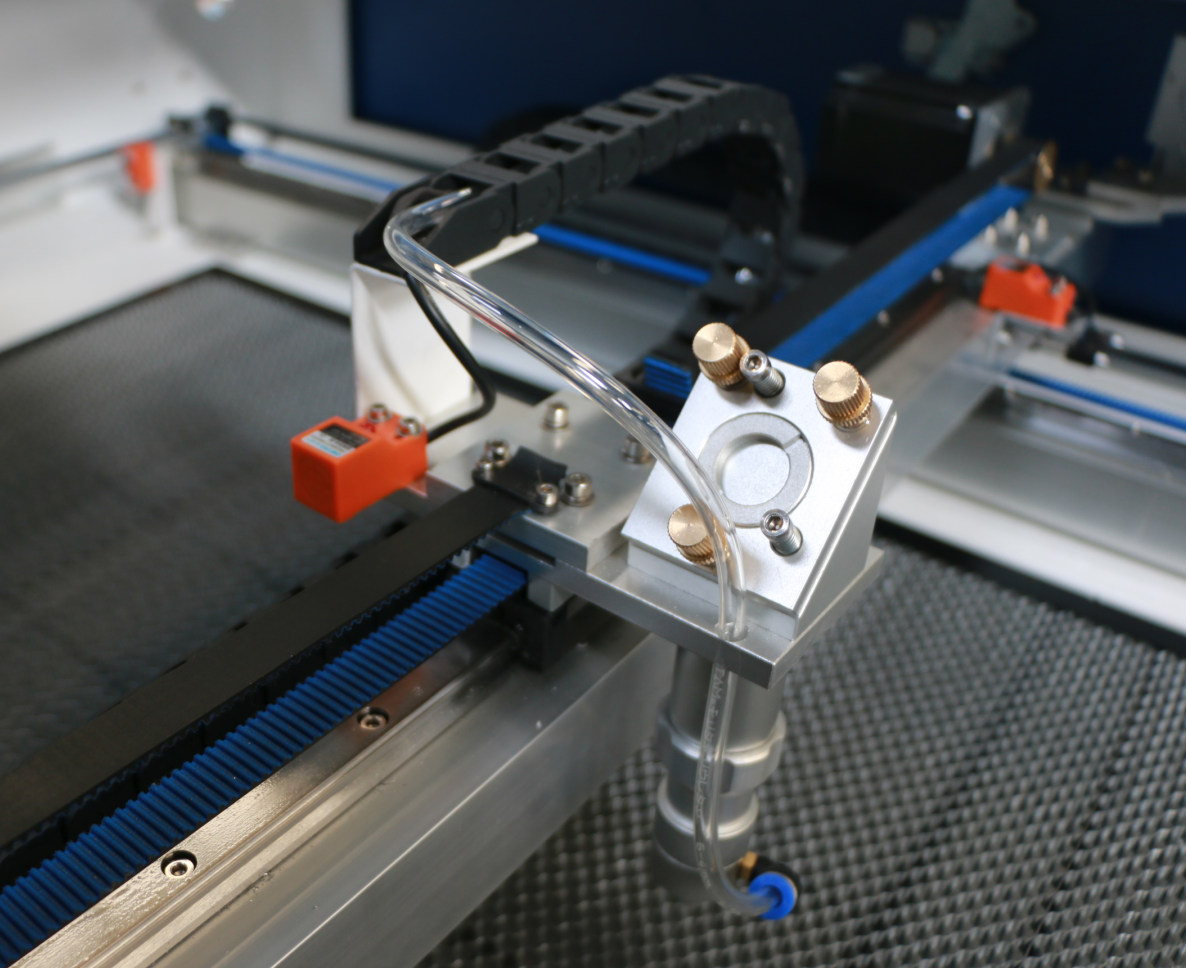
The steps of adjusting the optical path of laser engraving machine
The general steps of adjusting the optical path of laser engraving machine are as follows:
the first step: adjust the laser current below 8ma (50%), the laser power is not too strong;
The second step is the adjustment of the light path between the laser tube spot and the first reflector. Put the dimmer in front of the first lens, press the test switch with your hand (press off immediately, you can see the laser spot on the dimmer), and see if the spot is in the center of the first lens. If you cannot hit the lens or are too far from the center, you need to adjust the position or height of the first mirror frame (or laser tube) To enable it to meet the above standards.
Step 3: the adjustment of the optical path between the first reflector and the second reflector. First, put the dimmer in front of the second lens, move the beam of the X axis to the upper left corner, press the test button with your hand to see where the spot is, then move the beam of the X axis to the lower left corner, and press the test button as well. See if the two spots (upper left and lower left) coincide. If the spot is overlapped and the spot is located within the lens, the optical path between the first mirror and the second mirror is correct; if not, it is necessary to adjust the screw entry behind the first mirror holder Line adjustment to the upper left corner of the spot, so that the two spots overlap. Then adjust the position of the second mirror frame so that the spot hits about the center of the lens.
Step 4: the adjustment of the optical path between the second reflector and the third reflector (laser head). First move the laser head to the far left of the X axis, and stick the dimming paper to the hole on the left side of the laser head, press the test button to hit a spot, then move the laser head to the far right of the X axis, and then gently press the test button again. See if the two spots overlap, if the spot coincidence and both in the center of the laser head hole position, the optical path is correct; If it does not overlap, It is necessary to adjust the screw behind the second frame to the above standard. Then adjust the position of the front and rear direction of the second mirror frame and the height of the laser tube so that the beam hits the center of the hole in the laser head.
Step 5: the adjustment of the optical path between the third reflection lens and the focusing lens. Attach dimmer to the bottom of the laser head and click the test button to see if the spot is out of the center of the laser head. If so, the light path is correct; if not, the three screws on the laser head need to be adjusted so that the spot hits from the center of the laser head outlet. (note: step 3, step 4, step 5, the principle of optical path adjustment is
Step 6: after the light path detection is finished, the dimmer is pasted to the hole on the left side of the laser head, and the laser head is moved to the upper left corner, the lower left corner, the upper right corner, the lower right corner, the upper left corner, the lower right corner, the lower left corner, the lower right corner, and the lower right corner. Tap the test button separately to check if the spot is overlapped and at the center of the left hole, if so, the optical path is adjusted correctly, and if not, the light path is adjusted again in step 3 to step 5 until the above criteria are met.
Step 7: dimming end note: the adjustment of the optical path is the adjustment of the angle between the lens and the emitting point of the optical path (the angle between the correct path and the lens should be 45 degrees) Need certain basic knowledge, such as: the principle of light reflection, the first debugger must follow the instructions to operate, if necessary to consult the technical staff. In addition, laser has a certain burning ability and invisible light, so dimming the path must pay attention to safety.
More technical Questions,like how to maintain the CO2 Laser cutting and engraving machine,how to operate the 9060 1290 1390 laser engeaver,the applicable industry of laser cutter,pls contact me

